| modules | ||
| scripts | ||
| README.md | ||
| requirements_versions.txt | ||
| requirements.txt | ||
| screenshot.png | ||
| script.js | ||
| style.css | ||
| webui.bat | ||
| webui.py | ||
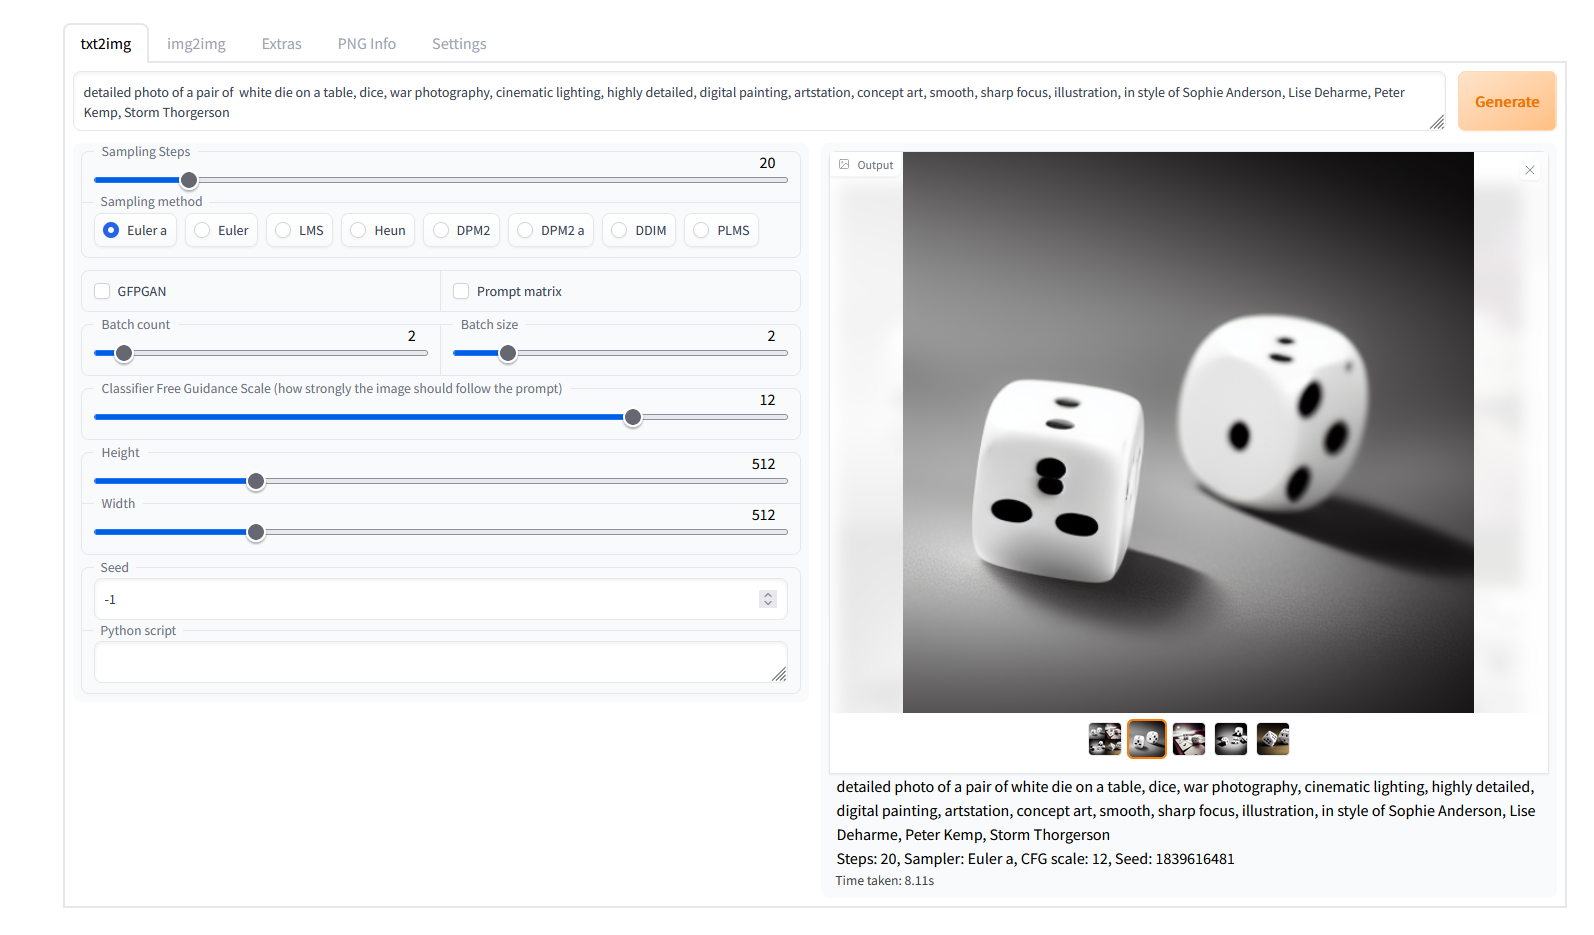
Stable Diffusion web UI
A browser interface based on Gradio library for Stable Diffusion.
Original script with Gradio UI was written by a kind anonymous user. This is a modification.
Feature showcase
Detailed feature showcase with images, art by Greg Rutkowski
- Original txt2img and img2img modes
- One click install and run script (but you still must install python, git and CUDA)
- Outpainting
- Inpainting
- Prompt matrix
- Stable Diffusion upscale
- Attention
- Loopback
- X/Y plot
- Textual Inversion
- Resizing options
- Sampling method selection
- Interrupt processing at any time
- 4GB videocard support
- Option to use GFPGAN
- Correct seeds for batches
- Prompt length validation
- Generation parameters added as text to PNG
- Tab to view an existing picture's generation parameters
- Settings page
- Running custom code from UI
- Mouseover hints fo most UI elements
Installing and running
You need python and git installed to run this, and an NVidia videocard.
I tested the installation to work Windows with Python 3.8.10, and with Python 3.10.6. You may be able to have success with different versions.
You need model.ckpt, Stable Diffusion model checkpoint, a big file containing the neural network weights. You
can obtain it from the following places:
- official download
- file storage
- magnet:?xt=urn:btih:3a4a612d75ed088ea542acac52f9f45987488d1c&dn=sd-v1-4.ckpt&tr=udp%3a%2f%2ftracker.openbittorrent.com%3a6969%2fannounce&tr=udp%3a%2f%2ftracker.opentrackr.org%3a1337
You optionally can use GPFGAN to improve faces, then you'll need to download the model from here.
Automatic installation/launch
- install Python 3.10.6
- install git
- install CUDA 11.3
- place
model.ckptinto webui directory, next towebui.bat. - (optional) place
GFPGANv1.3.pthinto webui directory, next towebui.bat. - run
webui.batfrom Windows Explorer.
Troublehooting:
- According to reports, intallation currently does not work in a directory with spaces in filenames.
- if your version of Python is not in PATH (or if another version is), edit
webui.bat, change the lineset PYTHON=pythonto say the full path to your python executable:set PYTHON=B:\soft\Python310\python.exe. You can do this for python, but not for git. - if you get out of memory errors and your videocard has low amount of VRAM (4GB), edit
webui.bat, change line 5 to fromset COMMANDLINE_ARGS=toset COMMANDLINE_ARGS=--medvram(see below for other possible options) - installer creates python virtual environment, so none of installed modules will affect your system installation of python if you had one prior to installing this.
- to prevent the creation of virtual environment and use your system python, edit
webui.batreplacingset VENV_DIR=venvwithset VENV_DIR=. - webui.bat installs requirements from files
requirements_versions.txt, which lists versions for modules specifically compatible with Python 3.10.6. If you choose to install for a different version of python, editingwebui.batto haveset REQS_FILE=requirements.txtinstead ofset REQS_FILE=requirements_versions.txtmay help (but I still reccomend you to just use the recommended version of python). - if you feel you broke something and want to reinstall from scratch, delete directories:
venv,repositories.
Manual instructions
Alternatively, if you don't want to run webui.bat, here are instructions for installing everything by hand:
:: crate a directory somewhere for stable diffusion and open cmd in it;
:: make sure you are in the right directory; the command must output the directory you chose
echo %cd%

:: install torch with CUDA support. See https://pytorch.org/get-started/locally/ for more instructions if this fails.
pip install torch --extra-index-url https://download.pytorch.org/whl/cu113

:: check if torch supports GPU; this must output "True". You need CUDA 11. installed for this. You might be able to use
:: a different version, but this is what I tested.
python -c "import torch; print(torch.cuda.is_available())"

:: clone Stable Diffusion repositories
git clone https://github.com/CompVis/stable-diffusion.git
git clone https://github.com/CompVis/taming-transformers

:: install requirements of Stable Diffusion
pip install transformers==4.19.2 diffusers invisible-watermark

:: install k-diffusion
pip install git+https://github.com/crowsonkb/k-diffusion.git

:: (optional) install GFPGAN to fix faces
pip install git+https://github.com/TencentARC/GFPGAN.git

:: go into stable diffusion's repo directory
cd stable-diffusion

:: clone web ui
git clone https://github.com/AUTOMATIC1111/stable-diffusion-webui.git

:: install requirements of web ui
pip install -r stable-diffusion-webui/requirements.txt

:: update numpy to latest version
pip install -U numpy

:: (outside of command line) put stable diffusion model into models/ldm/stable-diffusion-v1/model.ckpt; you'll have
:: to create one missing directory;
:: the command below must output something like: 1 File(s) 4,265,380,512 bytes
dir models\ldm\stable-diffusion-v1\model.ckpt

:: (outside of command line) put the GFPGAN model into same directory as webui script
:: the command below must output something like: 1 File(s) 348,632,874 bytes
dir stable-diffusion-webui\GFPGANv1.3.pth
After that the installation is finished.
Run the command to start web ui:
python stable-diffusion-webui/webui.py
If you have a 4GB video card, run the command with either --lowvram or --medvram argument:
python stable-diffusion-webui/webui.py --medvram
After a while, you will get a message like this:
Running on local URL: http://127.0.0.1:7860/
Open the URL in browser, and you are good to go.
What options to use for low VRAM videocardsd?
- If you have 4GB VRAM and want to make 512x512 (or maybe up to 640x640) images, use
--medvram. - If you have 4GB VRAM and want to make 512x512 images, but you get an out of memory error with
--medvram, use--lowvram --always-batch-cond-uncondinstead. - If you have 4GB VRAM and want to make images larger than you can with
--medvram, use--lowvram. - If you have more VRAM and want to make larger images than you can usually make, use
--medvram. You can use--lowvramalso but the effect will likely be barely noticeable. - Otherwise, do not use any of those.
Extra: if you get a green screen instead of generated pictures, you have a card that doesn't support half
precision floating point numbers. You must use --precision full --no-half in addition to other flags,
and the model will take much more space in VRAM.